Setting up Texas Instrument's Vegas2 Tablet
⬅️ Go back
Last updated: April 13, 2026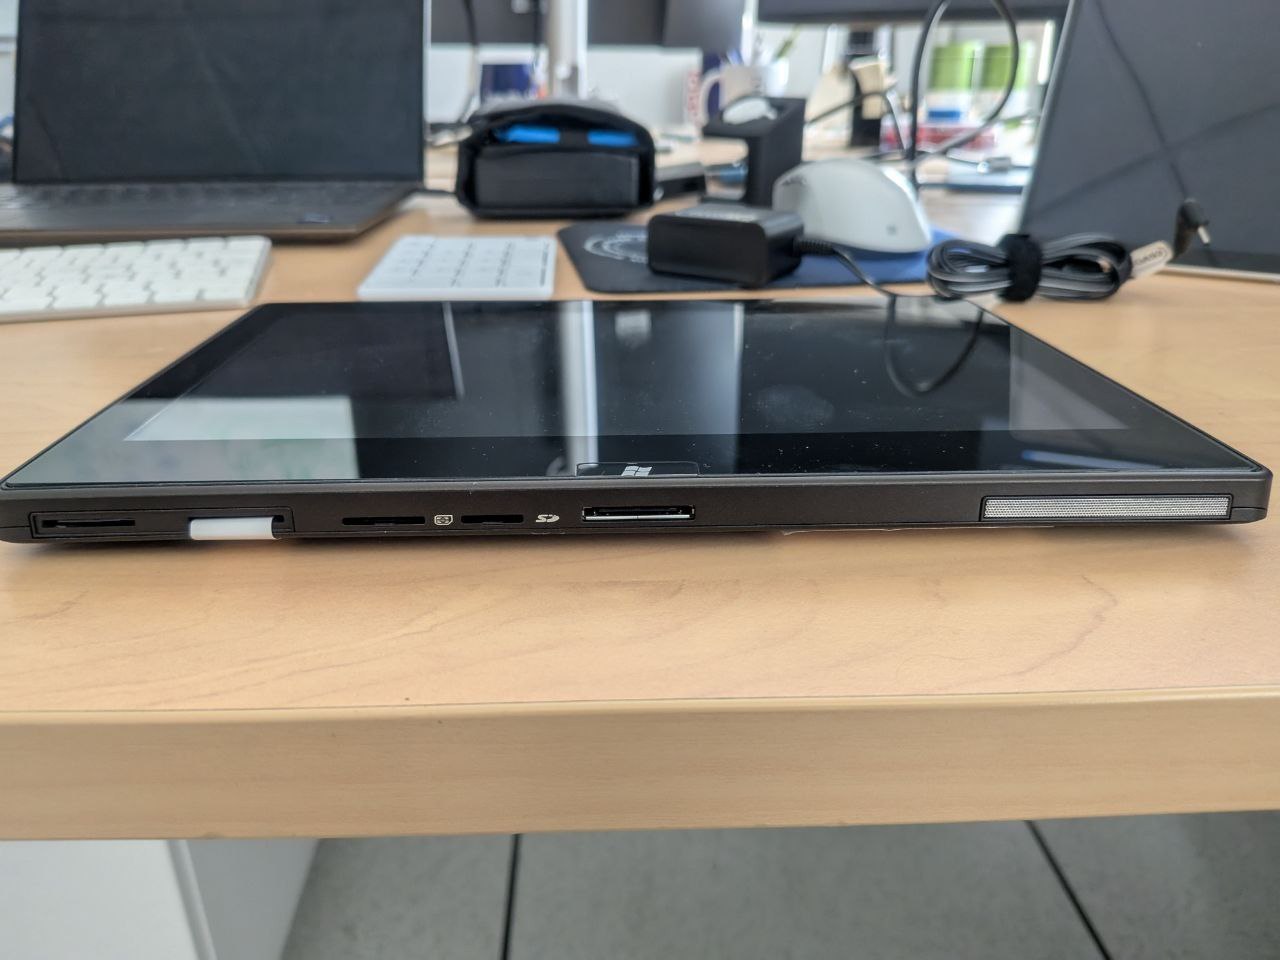
The Texas Instrument vegas2 was a tablet prototype made for demonstrating Windows on ARM on Texas Instrument OMAP processors back in 2011.
It has been featured in various trade shows running pre-release builds of what ended up becoming Windows RT.
Unfortunately no real product ever came out with an OMAP processor as TI exited the consumer tablet business shortly before Windows RT launched killing any hope of the public ever seeing a product materialize with OMAP and instead leaving only Qualcomm Snapdragon S4 and Tegra as an option for OEMs and end users.
The Vegas2 might be the only artefact remaining of that idea TI once had. A few units have also recently leaked into the wild.
These units however are empty and were never used. Setting up an OS or even loading one on them isn't trivial due to quirky firmware.
I however managed to load an OS on my personal Vegas2. And you too could do the same. Here's how I proceeded:
You will need the following equipment:
- The Vegas2 (with its power plug)
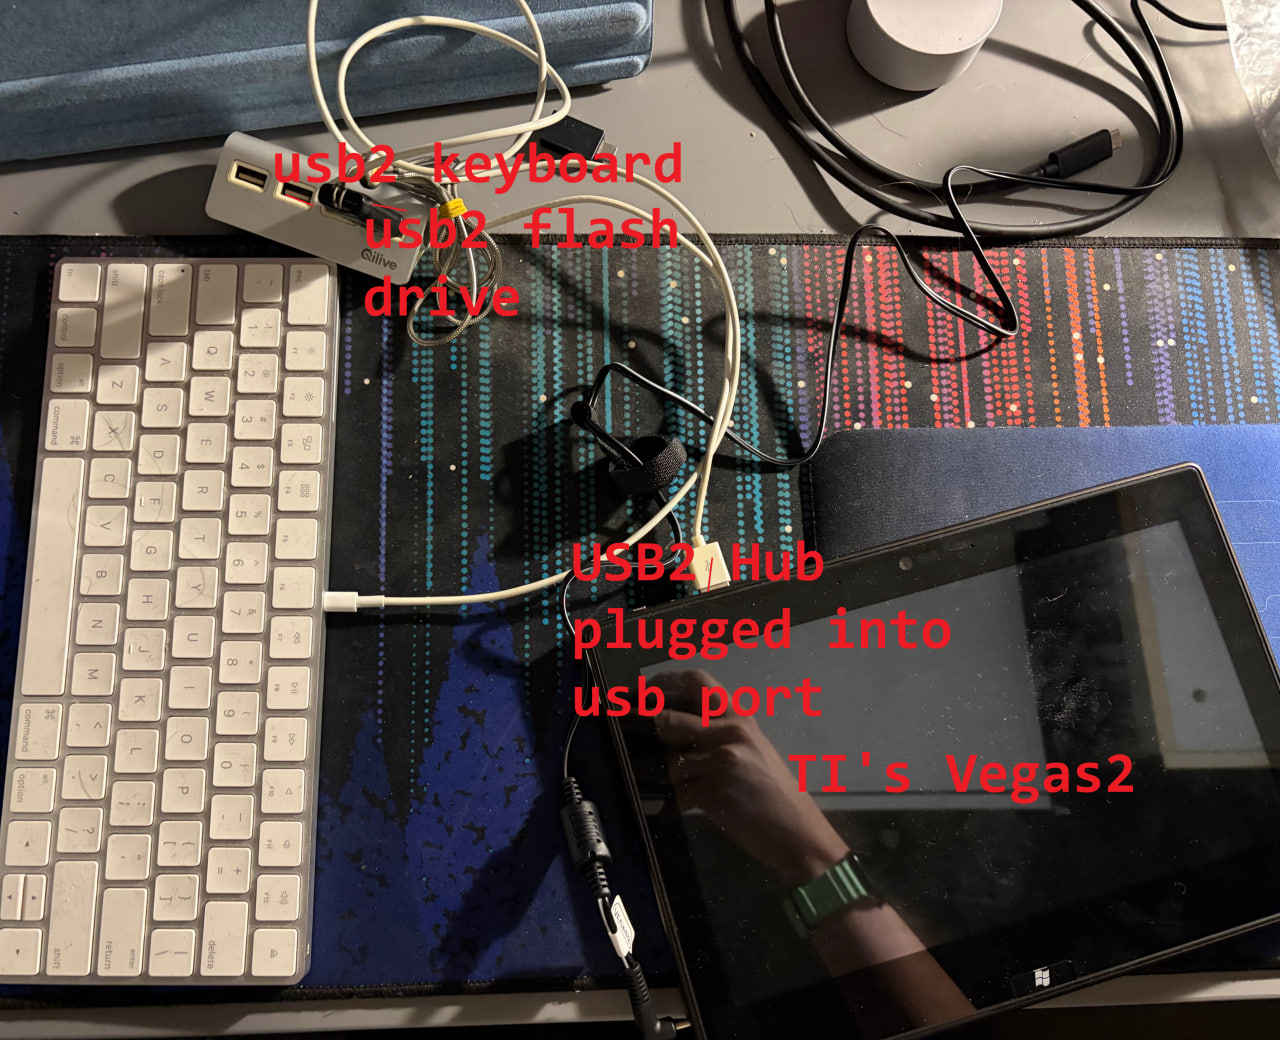
- An USB2 Hub (with at least 2 ports)
- An USB2 Flash drive
- An USB2 Keyboard
The Vegas2 UEFI refuses to chainload anything and even read any connected usb drive if a keyboard is not detected.
1) To boot from USB, first plug the USB Hub into the device sole USB A port.
2) Connect the USB keyboard into the Hub.
3) Prepare your USB Flash drive on another PC. Use GPT and not MBR for the partition table. Have a single partition formatted as FAT32.
4) Create a text file at the root of the USB drive, named script.txt, with the following content inside of it:
connect
start fs0:\efi\boot\bootarm.efi
5) Drop your favorite OS installation media into the USB drive, making sure the primary efi loader is present in \efi\boot\bootarm.efi and the OS is compiled for the ARM32 architecture
6) Plug the USB drive into the USB Hub
7) Plug the power cord into the Vegas2, the tablet should automatically turn on by itself, and should start your USB drive bootarm.efi file automatically.
Note: I will not detail here how to install or port an OS onto this thing :) However I will point out that the ACPI tables by default advertise the internal eMMC as removable which may conflict with some OS installers (hello Windows RT). I will also point out the keyboard really needs to be present at all times. There's no way currently to boot an OS without one connected at boot. But you can remove it once booted into an OS after.